Key takeaways
- You can fix most vinyl fence issues yourself fast, like broken fence panels, loose fence posts, or cracked fence rails, using simple tools.
- Replacing vinyl fence parts like a panel or straightening a wobbly vinyl fence post usually takes under an hour with stuff like a drill, screws, PVC glue, and a level.
- If your fence keeps falling apart after patches, it’s probably time to replace the part instead of fixing it again.
Cracks, wobbles, or busted fence panels… vinyl fences break more than you’d think. But most of the time, it’s nothing you can’t handle.
If you want to learn how to fix a vinyl fence, know that you don’t need fancy tools. And you definitely don’t need to spend half your weekend on it.
A vinyl fence’s durability lasts 20 to 30 years as long as it’s properly installed and maintained. This makes the odd repair totally worth it.
Most of these fixes take less than an hour and cost about the same as a sandwich.

Gather the tools and parts you’ll want before starting anything
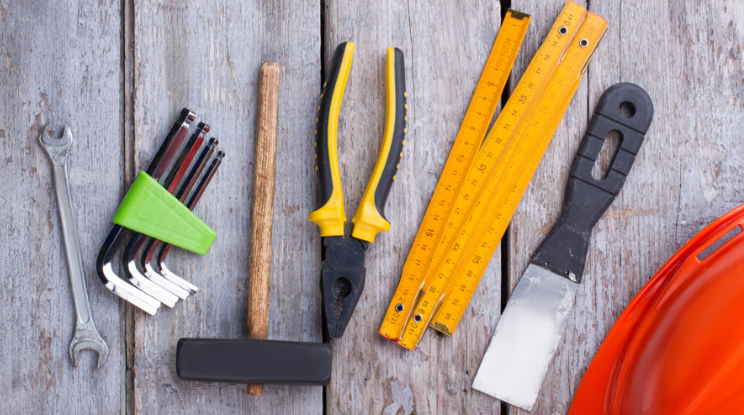
Don’t start pulling your fence apart until you’ve got these ready:
- You’ll need a drill or a screwdriver; either works, but a drill’s faster.
- Get stainless steel screws, or coated ones if that’s what’s available. These won’t rust in the rain.
- A rubber mallet is good for tapping things into place without breaking them.
- You’ll want a level to keep everything straight.
- And grab some PVC glue or epoxy adhesives, but make sure it’s the kind made for outdoors. Regular glue won’t hold up.
- For the smaller stuff, you’ll need a flathead screwdriver, a pair of pliers, and gloves.
- Work gloves aren’t just for show they save your hands from cuts and splinters. Safety glasses do the same for your eyes. Don’t skip those.
- Some extras might come in handy too. If you’ve got extra pickets or fence panels lying around, keep them close. Same with brackets or anchor kits if you’ve got a fence post that’s starting to lean.
- A little soap and a cloth help clean out any cracks before you seal things back up.
Check your shed before you go shopping. You probably already have half this stuff. Whatever’s missing, a quick trip to the hardware store will cover it.

How to fix vinyl fence fast — 5 easy repairs to DIY
Repair 1: Swap out a broken vinyl fence panel without taking the whole fence section apart

Cracked fence panels happen. Wind, kids, weed trimmers… it doesn’t really matter what caused it.
You just want it fixed fast without pulling apart the whole fence.
Start by checking how your original fence is built. Most vinyl fence panels slide between two horizontal fence rails. If that’s the case, you only need to remove the top rail to get the damaged piece out.
Grab a flathead screwdriver and pry the fence rail off gently. Some rails snap on, others have clips holding them in. Go slow here. If you rush it, you might end up cracking more than just the panel.
Once the top rail is off, pull the broken panel out. Some lift straight up, others have slats that slide sideways. Take a quick look at how it’s sitting before you yank it. Makes it easier to put the new one in.
Now slide in the new fence panel. Start with the bottom track, then lower it until it’s snug. Push the top rail back on and make sure it locks into place.
Before you call it done, check that everything lines up with the next section. If something’s off, pull it out and try again. Don’t force anything into place.
Repair 2: Make a loose post solid again
Wobbly post? It’s probably from shifting soil, a weak base, or a rushed install. Whatever the cause, you don’t have to tear everything out and replace the post to fix it.
Check the base first. If there’s no concrete holding it in, give it a light kick. If it moves or feels hollow, you’ve got room to work with.
Then, dig out about a foot of soil around the post.
Pour in gravel or crushed stone. Use a level to get the post straight, then pack the gravel tight. A tamping rod works best, but your boot will do in a pinch. You don’t need concrete for this. Gravel drains better and still holds strong if packed right.
Now, if the post is set in concrete and still moves, that usually means the concrete cracked underneath.
Don’t waste time trying to break it out. Instead, get a surface-mount bracket kit. These clamp around the post and screw into the concrete. Not the cleanest look, but it locks things down without digging.
Once it’s stable, seal around the base with an outdoor caulk. It keeps water from creeping in and making things worse later.
Repair 3: Seal small cracks now before they spread
Small cracks seem harmless, but they aren’t. They let water in, and that’s when problems start. Cold snaps, heat, and sun exposure make those cracks worse fast.
Know where to find them. Look at corners, the edges of pickets, and where rails meet posts. That’s where cracks usually show up first.
Clean the area with warm, soapy water. Rinse it and let it dry completely before you do anything else.
Apply PVC glue directly to the crack once it’s dry. You can use a small applicator tip or a brush, whatever gives you control. Brands like Christy’s or Oatey work fine. Don’t slather it on. A little goes a long way.
Hold the crack closed for a few minutes so the glue can set. Check the label for drying time, but most set up pretty fast.
If the crack runs deeper than it looks, push glue into the gap with a toothpick first. Then seal the surface.
Don’t bother with tape. It won’t hold up in weather, and it doesn’t fix the problem.
When it’s done right, the repair blends in, and more importantly, it keeps your fence from falling apart a few months down the line.
Repair 4: Reattach loose pickets with one screw, not a full replacement
When a picket feels loose, it’s usually from someone leaning on it or a tab that’s given out. Nothing major, but it can make the whole section look off.
Take a closer look inside the rail. Most vinyl pickets slide into the rails using built-in clips or slots. If the clip snapped, that’s what’s causing the problem.
Just grab a short screw and drive it through the side of the picket into the inner wall of the rail. You don’t need to replace the whole thing. Keep it low-profile so it stays out of sight and doesn’t catch on anything.
Use pliers to bend it back into shape if the clip isn’t broken but bent. Then pop the picket back in until it clicks.
Skip the glue. You’re not sealing anything. You’re just locking it back into place.
This fix takes a couple of minutes, saves the picket, and keeps extra plastic out of the trash.
Repair 5: Stop sagging rails before they bend or snap
Vinyl rails don’t handle heat well. When the sun beats down, long sections start to sag in the middle. That curve won’t go away on its own.
Measure the space between your posts. If it’s more than 8 feet, that’s likely what’s causing the dip. Long spans need some backup. You’ve got two ways to fix it:
- Add a mid-rail support bracket. Just screw it into the nearest post or panel face. It holds the rail from underneath and keeps it straight.
- Install a dummy stake. Stick a short vertical post in the ground under the sag, then screw the top of it into the bottom of the rail. It props it up without needing to set a new full post.
Whichever route you take, paint the bracket or stake to create a color-matched fence. Usually, white or beige blends in. Unless someone’s looking for it, they won’t see it.
Handle it early. If you wait, that slight dip can turn into a cracked rail and a full fence panel replacement.
When to stop fixing and start replacing
Not every piece is worth patching up. At some point, repairing vinyl fence can be a waste of time and money.
Homeowners spend hundreds of dollars, typically between $283 and $1,061 on vinyl fence repairs, with an average cost of $650. In cases like this, replacing the fence might be a better way to go.
What you are looking for is a panel with two visible cracks, a post that leans even after you’ve tried anchoring it, and rails that are too warped to sit level or lock in properly.
To find replacement parts that actually fit, flip a panel over. Most vinyl brands stamp their name or a part number on the back.
Take a photo of it and bring it with you to the store. You should find a whole selection of various fence panels, so try to get the same make and model. Close enough usually isn’t.
Don’t waste time patching something that’s already on its way out. You’ll be back out there fixing it again next month.
Instead, call a professional fence company to help you out. Most of them would offer vinyl fence installation services for your area.

Image source: Catalyst
Keep your fixed vinyl fence from falling apart again
Now that your fence is back in shape, it’s worth keeping it that way.
Clean it every few months with a mix of water and vinegar. It clears off grime without damaging the vinyl.
Skip the flowerpots and decorations. Even small stuff adds weight and stress. Over time, it pulls rails and pickets out of place.
Take a few minutes to walk the fence line after a storm. Look for wobbly posts, sagging rails, or panels starting to shift. Catching things early saves you from a full repair later.
Spray it with a UV protectant made for plastic twice a year if your fence gets a lot of sun. What it does is it slows down fading and cracking.
Stay ahead of the small stuff. A loose picket now turns into a busted panel if you let it slide.
If you check in on it a couple times a year, that fence should hold up for well over a decade.
Fix your vinyl fence now or let a fence repair service handle it for you
If the repairs are piling up or you’re short on time, there’s no shame in calling in help. A local fence repair service can handle cracked panels, leaning posts, and sagging rails without you having to lift a tool.
But if you’re up for it, most of these repair works take under an hour with the right tools.
Either way, don’t wait. Small issues only get worse.
Mend it yourself or reach out to a local fence company before it turns into a full replacement.